The Tunisian ladder stitch is an openwork stitch that I developed when searching for Tunisian crochet stitches that were more flexible and useful than the traditional ones. With this new stitch, you’ll get a sturdy mesh fabric if you use the yarn manufacturer’s recommended hook size. With a very large hook you can produce a lighter, more open mesh.
This is what I like to call a “stacked” Tunisian stitch. New rows are made above the old ones, and not in front of or behind them like most traditional Tunisian stitches. This “stacking” helps prevent the severe rolling that often occurs with Tunisian crochet.
Tunisian Ladder Stitch: How to Do It
U.S. crochet terminology
Base Chain
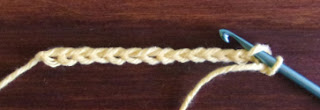
Chain desired number of stitches.
Base Row 1 – Tunisian Purl for first row only
Starting in 2nd loop from hook, [wrap yarn over front of hook counterclockwise, insert hook into next chain, pull yarn to the front – straightening out the yarn-over you just made, wrap yarn clockwise around back of hook, draw yarn through chain and onto hook], repeat to end. The number of loops on hook is equal to the number of chains made for the base chain.
Base Row 2
Ch 1, [draw yarn through both the new loop and next loop on hook], repeat to end, ch 1. Only 1 loop is left on hook.
Main Row 1 - Tunisian Ladder Stitches
Skip over both the first vertical bar at the end and the next vertical bar, [wrap yarn over front of hook counterclockwise, insert hook through the work front-to-back between previous vertical bar and the next one, pull yarn to the front – straightening out the yarn-over you just made, wrap yarn clockwise around back of hook, draw yarn through to front of work and onto hook, slide the new stitch to top of row close to hook], repeat to end, work 1 more st in the end space. The number of loops on hook is equal to the number of chains made for the base chain.
Main Row 2 (same as Base Row 2)
Ch 1, [draw yarn through both the new loop and next loop on hook], repeat to end, ch 1. Only 1 loop left on hook. Gently tug on the finished row stitches to lock the Tunisian ladder sts in place.
Repeat Main Rows 1 & 2 to desired length.
Tunisian Ladder Stitch: Photo Tutorial
U.S. crochet terminology
Base Chain
Make as many chains as you want stitches to be in each row.
Base Row 1 – Tunisian Purl for first row only
Make the first stitch in second chain from hook, [wrap the working yarn over the front of the hook counterclockwise,
insert the hook into the next chain, pull the working yarn to the front – straightening out the yarn-over you just made,
wrap the yarn clockwise around the back of the hook, draw the yarn through the chain and onto the hook],
repeat to end. The number of loops on the hook will equal the number of chains you made for the base chain.
Base Row 2
Chain 1, [draw a loop of the working yarn through both the new loop and the next loop on the hook],
repeat to end, chain 1. There should be only 1 loop left on the hook. Looking at your work, you'll see a series of vertical bars going down the row. It may help to give the row a stretch end-to-end, to straighten up the bars.
Tip: when you're ready to put down your work and do something else, place a removable stitch marker in the loop on the hook at this point. If you do it before the ch1 at the end, the marker may pull through the last 2 loops and undo some of your work.
Main Row 1 - Tunisian Ladder Stitches
Skip over both the first vertical bar at the end and the next vertical bar, [wrap the yarn over the front of the hook counterclockwise,
insert the hook through the work front-to-back between the previous vertical bar and the next one, pull the yarn to the front – straightening out the yarn-over you just made,
wrap the yarn clockwise around the back of the hook, draw the yarn through to the front of the work and onto hook,
slide the stitch to the top of the row close to the hook],
repeat to end, work 1 more st in the end space.
Main Row 2 (same as Base Row 2)
Chain 1, [draw a loop of the working yarn through both the new loop and the next loop on the hook],
repeat to end, chain 1. There should be only 1 loop left on the hook.
Gently tug on the finished row stitches to lock the Tunisian ladder stitches in place.
Repeat Main Rows 1 - 2 to desired length.
Upper Edge
For a neat, uniform edge on your final row, make a single-crochet stitch between vertical bars: skip over the first 2 vertical bars, sc to end, and make 1 more sc in the final space. With each sc, pull through both loops on hook, leaving only the newly made loop on the hook--no extra loops this time.
Some Tips for Tunisian Crochet
Here are a few things to try if you encounter curling, slanting, or stiffness:- Use a larger-than-usual hook, 3-5 sizes larger than recommended on the yarn label.
- Try thinner yarn.
- Use relaxed, less springy yarn, like cotton instead of wool.
- Do not work tightly.
- Be sure to skip over the first vertical bar(s) in each casting-on row (main row 1).
- Crochet a border around your work.
You can find additional information on Tunisian crochet here:
Get Started with Tunisian Crochet
includes a photo tutorial on the basic Tunisian stitch
Tunisian Purl Stitch
a photo tutorial on how to crochet the Tunisian Purl stitch
How to Stop Crying Over Tunisian Crochet
troubleshooting Tunisian crochet


No comments:
Post a Comment